I have breakfast issues. I’m allergic to bread and the texture of eggs makes my tongue want to cry. And then it’s winter a lot here, which makes it hard to think about lovely summer breakfasts like melon or smoothies or yogurt.
Thank goodness for muffins! The genius thing about muffins is that you can freeze them. So that means you can make an enormous batch and then defrost them as you want them. You can do this by thinking ahead and laying them out on the counter overnight, or you can pop them into the microwave. Or, if you are as toaster-oven-happy as I am, you can just split them before freezing and then pop them into the toaster oven straight from the freezer, which makes them even warmer!
These are not very sweet — you could add some granulated sugar if you preferred them sweeter — but are a flexible base that’s open to a lot of additions. I’ve listed some of my favorites at the bottom, but I also love them plain, split and toasted and buttered.
Bran muffins
Adapted from Farmgirl Fare
2 eggs
2/3 c. milk (I use whatever’s in my fridge; low-fat and whole both work fine)
2/3 c. plain yogurt or sour cream (again, low-fat works fine)
1/3 c. vegetable oil
1/3 c. molasses*
1/3 c. honey*
1 t. vanilla
2 c. wheat bran**
1 c. oat bran
1 c. whole wheat flour
2 t. baking soda
1 t. baking powder
generous pinch of salt
Additions as desired (see below!)
Preheat your oven to 375 F. Grease or line your muffin tins.
In a large bowl, mix the eggs, milk, yogurt or sour cream, oil, molasses, honey, and vanilla until they are combined. Add the dry ingredients — wheat bran, oat bran, flour, baking soda, baking powder, and salt — all at once. Mix just until combined. If you’re adding any extras, stir them in after the dry ingredients.
Fill muffin cups three-quarters full and bake for 22-25 minutes, until a toothpick comes out clean. I usually bake two pans at a time; if you do this, rotate them halfway.
When they come out, allow them to cool slightly before removing from the pan. They’ll keep for a few days on the countertop or for months in the freezer.
Additions I like:
*half a cup of shredded coconut
*1 cup of chocolate chips
*half a cup of chopped crystallized ginger
I hear the kind of people who like fruit in their muffins especially like blueberries in these.
*It’s actually possible to use a wide variety of sweeteners here, including cane syrup, agave, or all honey. All molasses is a bit strong for my tastes, but works. I haven’t yet tried maple syrup; if you do, tell me how it goes!
**I found Quaker-brand wheat bran in my regular grocery store, labeled as “unprocessed bran” on the front but clearly identified as wheat bran in the ingredients. If you have access to a store with bulk bins, you’ll almost certainly save some money by buying the bran that way.
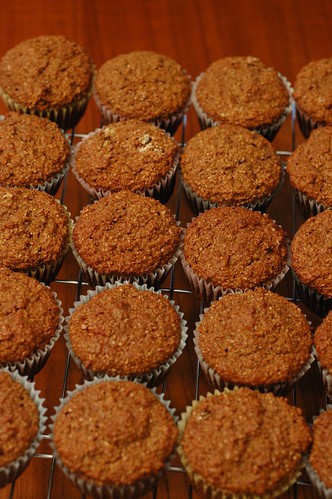
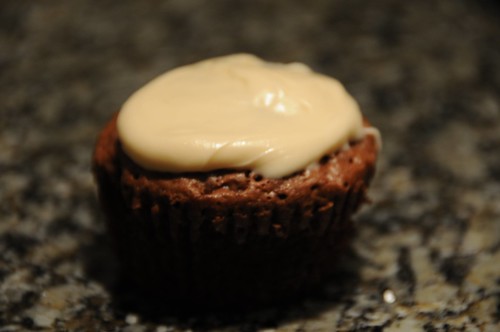
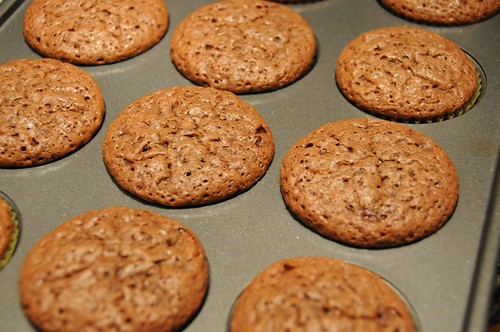
I would’ve sworn that I posted this recipe back in the fall, but I can find no evidence that I actually did so. That means I owe you an apology, because I’ve been depriving you of these delicious little bites of melty chocolatey goodness, probably for months.
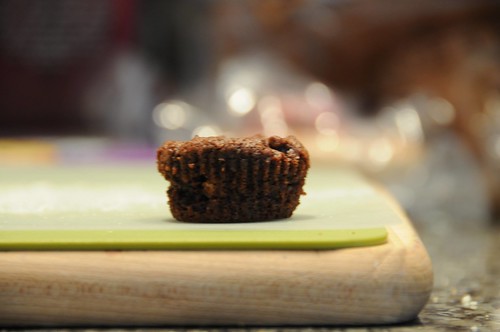
(I kind of love that picture.)
These little guys bake up as quickly as cookies, but have the whole mini-cupcake cute factor on their side when it comes to convincing people to pick them up. And once you pick one up, they speak for themselves. The espresso flavor is not pronounced: as is often the case, it comes through as depth and a touch of bitterness that balance the chocolate rather than a distinct taste of its own.
Chocolate Espresso Cookie Cups
Adapted from Elizabeth Falkner’s Demolition Desserts via Baking Bites
2 sticks of butter (1 cup)
3/4 c. plus 2 T. brown sugar
1/2 c. plus 1 T. white sugar
2 t. instant espresso powder
1 egg
1 t. vanilla
1 1/2 c. all purpose flour
3/4 c. cocoa powder
1/2 t. baking powder
1/2 t. baking soda
Pinch salt
2 c. of mixed chocolate chips (white, semi-sweet, and milk)
Preheat oven to 350 F. Grease or line a mini-muffin tin.
Cream the butter and sugars until well-mixed, then add the espresso powder, egg, and vanilla.
Mix in the flour, cocoa powder, baking powder, baking soda, and salt. (Sift any of these ingredients that have big lumps.) Then add the chocolate chips.
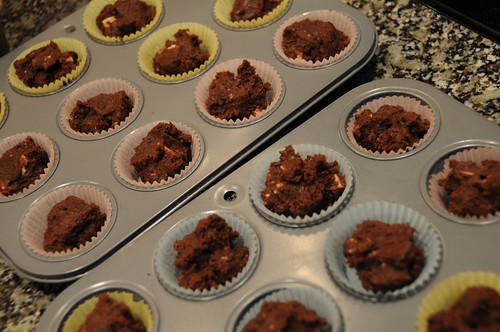
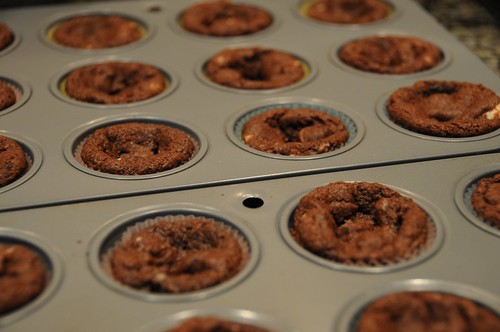
Dollop into the mini-muffin pan and bake for about ten minutes, until the tops no longer appear wet. Remove from the oven. If you’re using liners, you can turn them out of the pan after about ten minutes; if not, give them a few more minutes so they don’t disintegrate on the rack.
I first encountered these non-traditional quesadillas at a tapas party, where slices were among the small plates on offer. They’re a brilliant combination — the mild sweet potato filling, sharp cheddar cheese, a crispy tortilla — and I pretty much went straight home and wrote an email to ask for the recipe.
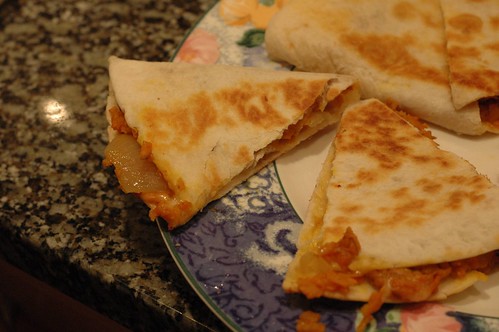
I like these as they are for a snack or light meal. If you want to make them more substantial, you can add black beans to the filling. You can also add goat cheese, which makes the filling creamy and rich-tasting, but do so in addition to the cheddar (which plays an important structural role), not instead of. I love leftovers reheated in a toaster oven, but people who aren’t as obsessed as I am with crispness have reportedly enjoyed them reheated in a microwave too.
For folks with wheat or gluten issues, I did test these with corn tortillas, and it is possible, but a bit tricky. You need to heat the tortillas one batch at a time in the microwave, wrapped in a damp paper towel, and then work quickly to fill them and get them into the pan while they’re still at their most pliable. Some of mine still cracked, but they all held on to their filling. I recommend using small tortillas so you don’t have to try to cut them after cooking.
Incidentally, there’s a lot of conflicting information on what a sweet potato is or isn’t, especially when compared with a yam. In this case, the important part is to get something that’s orange on the inside, not white.
(By the way, I’m trying putting all of the photos up at the top so you have the text of the recipe uninterrupted. Let me know what you think about this in the comments.)
Sweet potato quesadillas
I adapted this from a friend’s version, who in turn adapted it from what I believe to be the original in Moosewood Cooks at Home
1 1/2 lbs. sweet potatoes (one huge potato or two more reasonably-sized ones)
1 small onion
3-6 cloves of garlic (or 1-2 t. jarred crushed garlic)
2 T. canola oil plus extra for the pan
1 t. chili powder*
1/2 t. ground cumin
salt and pepper
8 flour tortillas (I usually use 10-inch ones)
1 to 1 1/2 cups grated cheddar cheese**
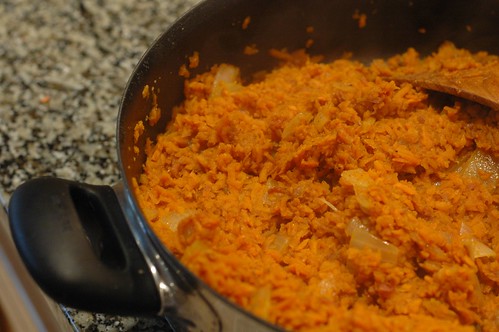
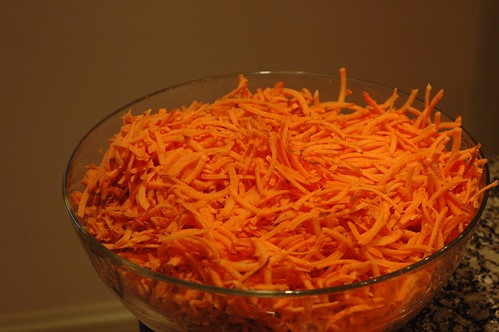
Wash and grate the sweet potatoes, then peel and dice the onion. If you’re using fresh garlic, put it through a garlic press or mince. Add the canola oil to a large frying pan and heat over medium. Then add the onion and cook until softened, about five minutes.
Add the cumin and chili powder to the pan and stir for a minute until they’re well mixed in, then add the sweet potatoes. Keep stirring until the potatoes and spices are mixed, then cover the pan and cook for about fifteen minutes, stirring every five minutes. If the potatoes are sticking to the pan, add a bit more oil. After ten minutes, the potatoes should be cooked through; after fifteen, the filling should be easily squishable. Add salt and pepper to taste.
Remove the filling from the heat and get out a frying pan. Heat it over medium and pour a bit of canola in the bottom. You can either fill the tortillas directly in the pan or fill them on the counter and then stick them in the pan. Either way, you want to smear half of the tortilla with the sweet potato mixture and then top it with a couple of tablespoons of the grated cheese. Cook one or two at a time in the skillet until the tortilla is browned and the cheese is melted, then turn over and brown on the other side before moving them to a wooden cutting board.
Some cutting recommendations: kitchen shears and a pizza wheel both work well for this, but I end up using my chef’s knife most of the time. Cutting into thirds is easier than quarters. Don’t sweat the messiness of the middle pieces; they still taste good.
I like these with salsa on top; I hear they’re also good with sour cream if you like that sort of thing.
*I used the Ancho chili powder from Penzey’s, which is flavorful but not hot. If you prefer heat, go for a hotter blend. Among grocery store brands, Cook’s Illustrated likes the Spice Island blend best. Chili powders vary tremendously, so finding one you like is an experiment that will serve you well in the future.
**I have made this with all kinds of cheeses and like sharp cheddar the best. I can buy grated Cabot “Seriously Sharp” cheddar at my grocery store; you could also grate this amount on a box grater without too much trouble. As usual, I recommend avoiding anything unnaturally orange.
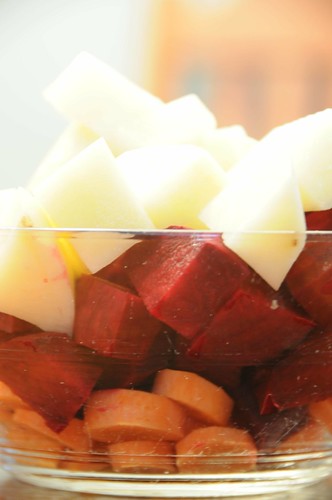
Even though borscht was the first way I ever ate beets (at a pretty awesome tasting dinner at evoo a few years back), I hadn’t made it until recently. I have no real excuse for this other than having no personal vision of borscht that would allow me to sort through the hundreds of different recipes available and select one. But this winter, that problem was solved for me by necessity: given an overwhelming beet situation, I just picked one on the basis of “having all of the basic ingredients in my kitchen at the time.” Very scientific.
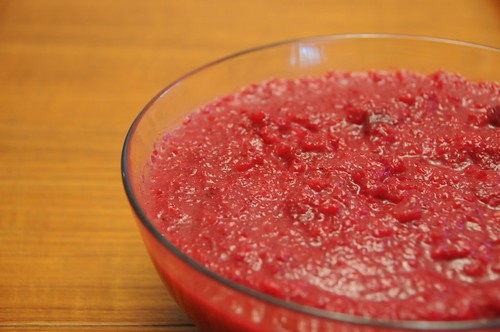
The best thing about the soup below is that it is both fast and easy, rare qualities in a soup. It took me a bit over an hour, start to finish, including peeling and chopping the vegetables. You can also serve it pureed (as shown above) or not, depending on your preference. And for something made with vegetables in season at the dead of winter, it is surprisingly light and fresh, more like a vegetable soup than like a stew. Combined with its brilliant hue, it makes for a nice break from the beige diet of late winter.
Borscht
Wildly adapated from the Kitchn
3 T. olive oil
1 large or 2 small onions
5 cloves of garlic or about 2 t. jarred crushed garlic
1 t. dried dill
4 carrots
2 potatoes (about 1 lb; use starchy potatoes if you have them)
1 bunch beets (about 1 1/2 lbs)
2 t. kosher salt
1/2 t. lemon juice (from half a lemon or a jar)
1 T. brown sugar
1/4 c. apple cider vinegar
Freshly ground black pepper
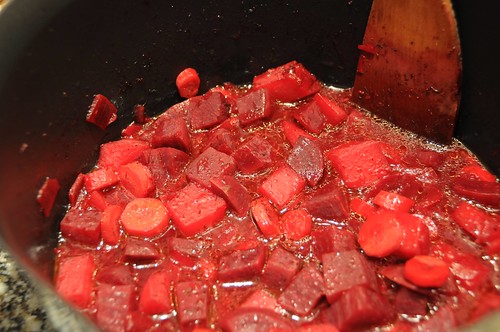
Peel and dice the onions. Then do the same to the carrots, beets, and potatoes, aiming for half-inch chunks.
Heat the olive oil in a big stock pot over medium heat. Add the onions and cook until softened and translucent, about five minutes. Add the garlic and dill, stir, and cook for another minute or two until fragrant. Then add the carrots, beets, and potatoes. Cook for another five minutes, until the vegetables start to lose their crispness.
Add the salt, lemon juice, sugar, and vinegar, plus four cups of water. Mix well, and turn up the heat so it boils. Then reduce the heat to a simmer, and cook until all the vegetables are tender. Start checking for this around 30 minutes, but it could take up to 50 minutes, depending on the size of the pieces.
If you want to serve it as a chunky soup, you can go ahead serve it as soon as it is cooked. If you want to puree, you’ll probably need to remove it from the heat and wait for it to stop boiling, then do it in batches in your blender or food processor. (It’s a bit much for an immersion blender, I’m afraid.) If you find the texture too thick after pureeing, you can add more water.
Many people like this with sour cream, although I preferred it plain. Makes about six cups.
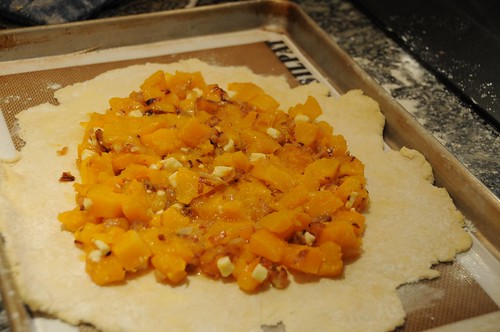
It’s been kind of non-stop sweets around here lately, so here are some vegetables in case any of you were thinking it wasn’t a good idea to have cupcakes for dinner (again). This is a bit time-intensive (it took me about 90 minutes), but if you’re going to make it, I strongly recommend doubling, because it is also awesomeness-intensive.
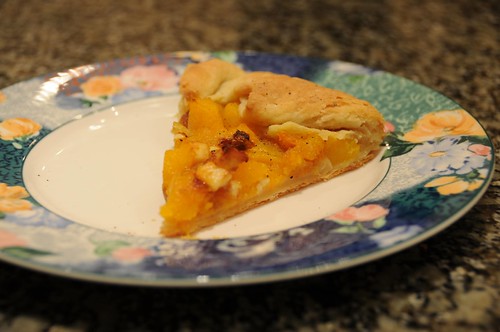
The crust for this is the truly amazing part: it’s easy to work with and reliably creates a crust that’s both tasty and flaky. I encourage you to experiment with fillings, but I happen to love this one.
Butternut Squash and Caramelized Onion Galette
Adapted from Smitten Kitchen
For the crust:
1 1/4 c. all-purpose flour
Pinch salt
1 stick butter, cold from the fridge (1/2 c., use unsalted if you have it)
1/4 c. sour cream
2 t. lemon juice (from a jar is fine!)
1/4 c. very cold water
For the filling:
1 butternut squash (1 to 1 1/2 lbs)
2 T. olive oil
Two pinches of salt
2 T. butter
1 onion
1/2 t. dried sage
1-2 oz. feta cheese
Black pepper
First:
Preheat the oven to 375.
Make the crust:
Put the flour and salt in a bowl. Open the stick of butter and cut it into a dozen or so slices, then dump these all into the bowl. Cut the butter into the flour until it has the texture of damp sand. (I usually start with a pastry blender or forks and end up using my hands.) Make a well in the center, and add the sour cream, lemon juice, and 2 T. of the water. Mix until the dough forms a ball, adding the rest of the water if needed. (If it’s very dry in your area, you might even need a bit more water.) Don’t overwork the dough here. When you have a ball, wrap it in plastic wrap and stick it in the fridge.
Make the filling:
Peel your squash and cut off the ends. Then cut it in half and scoop out the seeds and strings. Cut the squash into half-inch chunks; it’s a good idea to really get them this small in this case so your filling is reasonably spreadable. Line your pan with foil (9×13 should work for one squash; you’ll probably need to use two or a jelly roll pan if you’re doubling) and add the squash chunks. Toss them with the olive oil and a pinch of salt and roast for thirty minutes or until it can easily be pierced all the way through with a toothpick or fork.
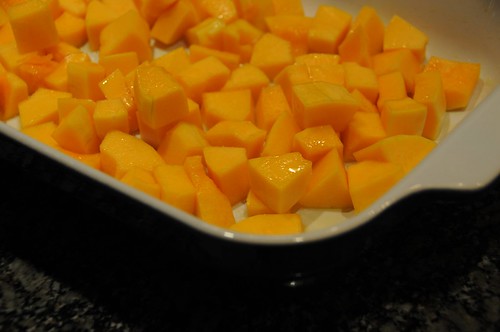
(Yes, I did not line my pan with foil. That’s because it is an awesome stoneware pan and is super-easy to clean, even when covered in caramelized squash sugars.)
While the squash is roasting, peel the onion and dice it. Melt the butter in a heavy-bottomed skillet over medium-low heat, then add the onions and a pinch of salt. Cook, stirring occasionally, until they’re light golden brown, which will take about 20 minutes on the lowest heat that keeps them sizzling and about five on medium heat.
While they’re caramelizing, chop the feta into small (1/8-inch) pieces. I aimed for a generous quarter cup, but you could use more if you like the taste or have a milder cheese.
When the squash is ready, take it out of the oven and raise the oven temperature to 400. Mix the squash with the caramelized onions, feta, and sage in a bowl.
Take the galette dough out of the fridge. (It probably needs at least 45 minutes or so in there, in case your mad knife skills got you through the filling prep faster.) Lightly flour a Silpat or piece of parchment. If it’s less than twelve inches across (the diameter to which you’ll roll the dough), also flour the surrounding counter. Then roll the dough into a roughly twelve-inch circle and lift it on its parchment to the sheet you’ll bake it on. If needed, you can drape the extra dough over the sides of the sheet.
Spread the squash filling over the dough, leaving a 1 1/2 inch border. Sprinkle with black pepper.
Starting in one spot, fold in the edge, and then move around in one direction, folding the edge up, pleating it as you go to make it fit.
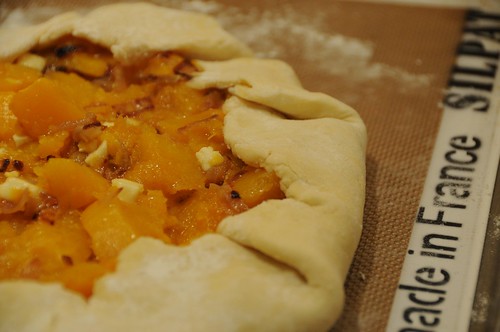
Bake for about 35 minutes, until the crust is golden brown. Let it stand on the cookie sheet for five or ten minutes, then slide it (or lift using a couple of spatulas) on to a serving plate or board. Slice and serve.
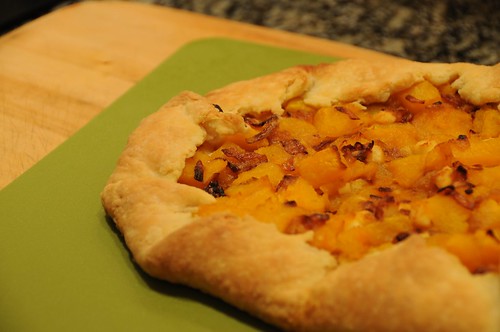
If there are leftovers, some people like them room temperature, but I liked them best reheated briefly in the oven or toaster oven.
These are some very serious cupcakes. You’re almost certainly going to have to go to the store before you can make them. They require you to make your own caramel. You’re going to have to wash a small mountain of dishes. But they are mighty. I used them to bribe people to help me move (it worked); I gave a couple of leftovers to my new mama friend, the one whose baby brought you those tasty, tasty cookies.
The mightiness of these cupcakes comes in many forms. First, there’s the one-two punch of melted chocolate plus cocoa powder. There’s the knock-you-upside-the-head richness created by over a pound of butter and the better part of a dozen eggs. But the richness somehow manages to mesh perfectly with a lightly-textured cake, and if you can stop eating the caramel with your fingers…well, you’re a better person than I am.
By the way, this recipe is being posted just a few days after I cooked it (not my usual MO) because my Dad specifically wrote to me to ask where it was. And also so that after you eat six of them, you can’t say I didn’t warn you.
Chocolate cupcakes with salted caramel frosting
Adapted from Cupcake Blog. The original is well worth checking out: it has a sneaky method for making a batch that’s half regular and half gluten-free cupcakes, as well as much snappier styling than what I’ve got.
For the cupcakes:
7 oz. bittersweet chocolate
3 sticks butter (that’s 1 1/2 c.)
2 1/4 c. sugar
8 eggs
1 1/4 c. flour
4 T. cocoa powder
1 1/2 t. baking powder
pinch salt
For the salted caramel
4 T. water
1 c. sugar*
2 T. Lyle’s Golden Syrup**
1/2 c. heavy cream
2 T. butter
1/2 t. lemon juice***
1/2 t. fine-grain sea salt
For the frosting:
2 sticks butter (1 c.)
8 oz. cream cheese (regular or reduced-fat; not fat-free!)
3-4 c. powdered sugar
Before you start:
Put the butter and cream cheese for the frosting on the counter to soften.
Make the cupcakes:
Preheat the oven to 350.
Break the chocolate into pieces, either by hand or with a knife if necessary.

Put it and the butter in a large bowl and microwave in thirty-second increments, stirring in between, until nearly smooth. Then remove and stir until completely smooth. Stir in the sugar.
Check with a fingertip to make sure the mixture is not still hot. If it is, let it cool for a few minutes. When it’s not too hot to touch, stir in the eggs. I recommend doing this one or two at a time (eight is a lot of eggs) and stirring vigorously until they’re thoroughly incorporated.
Stir in the flour, baking soda, and salt. Add the cocoa powder as well, sifting if there are any lumps. Mix until combined.
Scoop into lined or greased cupcake tins. Fill the cups only about 2/3 full so they don’t overflow. Bake for 15 minutes, then rotate the pans (at least back-to-front; switch racks if you have them on two) and bake for about ten more minutes, until the tops appear just dry and a toothpick comes out clean. You can make the caramel while they bake!
[Note: for me, this made 26 cupcakes. For the extra two, you can use foil or silicone baking cups, both of which are strong enough to stand up on a cookie sheet. Put one of your pans of cupcakes on the sheet too and just tuck the extras in at the edge to save space.]
Make the caramel:
[A word to the wise: this would be a good time to make sure chaos-prone members of your household are not underfoot. Sugar syrup burns aren’t so fun, and you’re going to want to give this part your undivided attention.]
Combine water, sugar, and syrup in a deep saucepan and stir to combine. (I like to use a nonstick pan for easy cleanup, but it does make it a bit harder to judge when the caramel is done because of the dark interior. The “deep” part is the most important one, though!) Put the saucepan over medium heat. Cover and cook for two minutes.
Then remove the cover and turn the heat up to medium-high. If the mixture isn’t already boiling, it will start. Cook it without stirring from now on. (This helps keep the sugar from crystallizing.) Instead, you can shake or swirl the pan.
You’re just going to cook it until it turns a nice, dark amber. The syrup is already a bit dark, so it can be tricky to tell exactly how this is going. It will boil for some minutes — I’d guess three to five — and then start darkening in color. (What’s happening is that the water is boiling off before the sugar starts to caramelize.) So look for the color to start changing towards darker. But also, don’t worry too much: I under-caramelized mine slightly, and it’s still excellent.
When it’s dark amber, remove it from the heat and wait a few seconds, then carefully pour in the cream and stir to combine. The mixture will bubble and steam, so keep your face away from the pot.
Remove from the heat and stir in the butter, lemon juice, and salt.
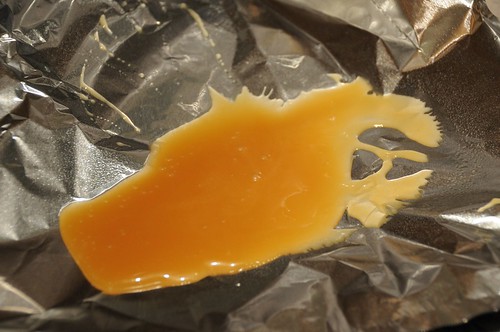
Measure out one cup using a metal cup or by pouring it into a Pyrex measure.
You’ll probably have a few tablespoons left over; you can pour these on to foil to cool. I just ate mine, but you could use yours for cupcake decoration, too. You’ll need to throw it in the freezer if you want to do this in some way other than drizzling!
Make the frosting:
You’ll need to wait until your caramel goes from burning hot to merely warm for this part.
If your butter and cream cheese aren’t soft, soften them with a brief stint in the microwave on 50% power. (Use fifteen-second increments; you don’t want them melty.)
Using a hand or stand mixer, beat the butter and cream cheese together until they’re uniform in texture.
Sift in 2 cups of powdered sugar and mix to combine. (Start on a low speed if you don’t like your kitchen covered in sugar, yes? You can also throw a towel over the top of a stand mixer.)
Beat in the reserved cup of caramel. Then sift in more powdered sugar until you reach the desired taste and texture. The frosting will get stiffer as you add more sugar, but I found that three cups was about enough for me. It made for a relaxed kind of frosting — it’s spreadable even straight from the fridge — but it was as much sweet as I could take, even balanced with the cream cheese.
And Bob’s your uncle!****
Frost the cupcakes and try not to eat them all.
*This is a time when regular old granulated white sugar, or the closest thing you use to it, is your friend.
**Ok, so you could actually use corn syrup here — go for the light stuff — in a pinch. It gives me a belly ache though. Lyle’s is cane syrup and can often be found in the international foods aisle (along with other imports from the strange lands of England or Ireland). If not, there’s always the internet
***I wildly prefer Santa Cruz Organics lemon juice, which I can also get at my local natural food store, to regular bottled lemon juice.
****I learned this phrase when I was in Britain and I have an unreasonable love for it.
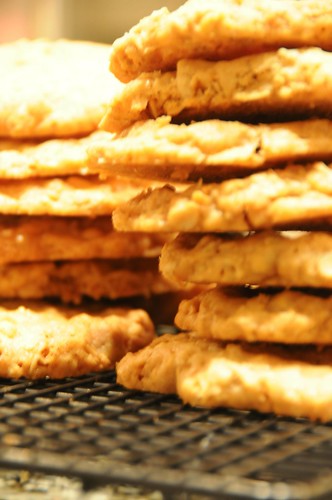
This recipe has made it up here solely by popular acclaim. When I first made it, I was pretty surprised: the cookies are thick but crunchy, very sweet and very buttery all at once. I was ready to file the whole thing away as an interesting experiment when I brought them to a baby shower — which, possibly predictably, turned out to be full of people who love thick, crunchy, sweet, buttery cookies. So if you make these and love them, you have my friend’s baby to thank for it.
When I bake cookies, I put one rack in the top third of my oven and one in the bottom third. I put in two sheets of cookies at a time, and halfway through, I rotate them, switching racks and turning the back to the front. I have never, as far as I can remember had cookies fail because of this brief exposure to room-temperature air, so I recommend it as a way to get twice as many done in one batch!
White chocolate oatmeal cookies
Adapted from Cook’s Illustrated via Smitten Kitchen (where Deb salts them)
1 3/4 sticks of butter (that’s 14 tablespoons, if you’re counting)
1 c. white sugar
1/4 c. light brown sugar*
1 c. flour
3/4 t. baking powder
1/2 t. baking soda
pinch salt
1 egg
1 t. vanilla extract
2 1/2 c. oats**
6 oz. white chocolate (chips or chopped)
Preheat oven to 350 F. Line two baking sheets with parchment paper or silicone liners.
Soften the butter (either by organizedly leaving it out overnight or in the microwave) and cream it with the brown and white sugars. Add the egg and vanilla.
Then mix in the flour, leavening, and salt and mix to combine. Finally, add the oats and white chocolate and stir until they’re evenly distributed.
Form fairly big cookies — the balls of dough should be close to two inches in diameter — and place them on the cookie sheets, smushing them slightly with your hands or a spoon.
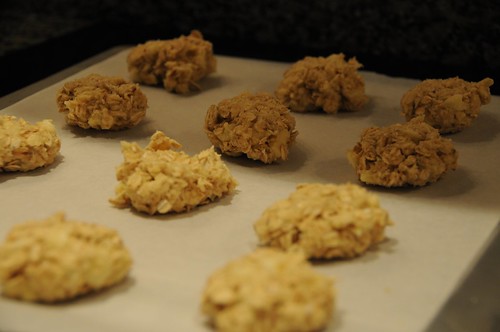
Bake 14-18 minutes until golden brown, rotating the sheets halfway through. Let cool for a minute before removing them to a cooling rack. Exercise caution when transporting these cookies, as they are prone to crumbling if not handled gently.
*Normally I don’t respect light brown sugar and dark brown sugar as different entities, but in this case, the cookies themselves are very light in color, so the light brown sugar preserves both that and the crispiness.
**Old-fashioned oats are your best bet, but quick-cooking work too.
“Foods I didn’t discover until adulthood” are getting to be a theme on this blog, which I’m pretty sure is because there are so darn many of them. As a young child, I only ate three things we could reliably get outside of the house: hamburgers (well-done only, no pink), pepperoni pizza, and spaghetti with red sauce. Add a father with equally, er, selective tastes and you get a childhood with fairly limited cuisine.
So that’s how it happened that I didn’t discover Indian food until I went to live in England for a year when I was twenty. (Other discoveries of the same year: sushi, falafel, and portobello mushrooms. Also wine and kir. It was a good time.) And then, for years, I ate amazing Indian food in restaurants, but utterly failed to recreate anything like it at home.
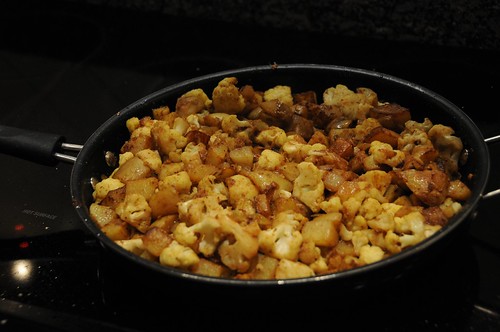
Fortunately for all of us, that era is past. The secret, it turns out, is really great garam masala. I buy it from an Indian grocery, but you can also get it online, and it is the difference between “random bunch of Indian-inspired spices” and “YUM.” This recipe for potatoes and cauliflower (aloo gobi) is a little less saucy than most restaurant preparations, but every bit as tasty.
Indian-style Cauliflower and Potatoes
Adapted from Madhur Jeffrey’s World Vegetarian
Canola oil for the pan
About 1 pound of potatoes
About 1 1/2 pounds of cauliflower
1 onion
About an inch-long piece of fresh ginger
1/4 t. turmeric
1 t. ground cumin
1 t. ground coriander
1/2 t. garam masala
1/2 t. salt plus more to taste
black pepper to taste
First, wash the potatoes. Chop into one-inch chunks. Line a plate with paper towels and set it to the side.
Heat a large skillet with a lid* with a about three tablespoons of oil and the same amount of water over medium heat. When it is hot, add the potatoes and cover. Cook until the potatoes are cooked through, 7-12 minutes.
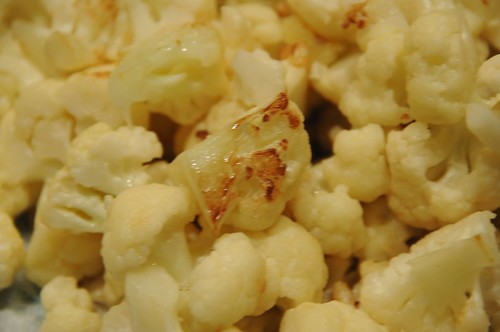
While this is happening, chop off the stem of the cauliflower, and then chop it into florets, no more than about an inch and a half across. It’s okay to cut large natural florets into smaller pieces with a knife.
Then remove the lid from the potatoes and allow the water to boil off. (You can check to make sure they’re done by poking with a fork or toothpick; it should easily pierce all the way through.)
Fry the potatoes until they are golden brown, stirring only occasionally, 3-5 minutes per side, adding oil as needed to prevent sticking. When the potatoes are done, use a spatula or slotted spoon to remove them to the prepared plate, and line a second plate with paper towels.
Add the cauliflower to the remaining oil (add more if needed!) and cook, stirring only occasionally, until it is soft and caramelized on the edges, 5-8 minutes. While it is cooking, peel and chop the onion.
When the cauliflower is done, use the spatula to turn it out onto the second plate. Check to make sure there are a couple of tablespoons of oil in the bottom of the pan, then add the onion. As it softens, grate the ginger.**
When the onion is soft, add the ginger to the skillet and cook half a minute, until it is fragrant. Add the other spices and stir to coat everything, then add the potatoes and cauliflower back in, along with three tablespoons of water. Stir everything to coat, then turn the heat down, cover, and allow to cook for about five minutes.
This recipe makes about four servings and reheats beautifully. It also doubles well, but the vegetables really get some of their flavor from their contact with the pan during the initial frying (which caramelizes them to that lovely golden brown), so you may need to do that step in batches.
*The lid doesn’t have to belong to the pot, just to cover it or the contents reasonably well.
**I love a microplane grater for this; my favorite is a big flat one like this.
I post a lot of breakfast recipes because I have breakfast problems. I like to eat it, but I’m a pickypants about traditional breakfast foods: I don’t like eggs, I only eat oatmeal under select circumstances, and the yeast in bread gives me bellyaches. In the winter, it seems too cold for yogurt, my usual breakfast staple, so I do a lot of breakfast baking.

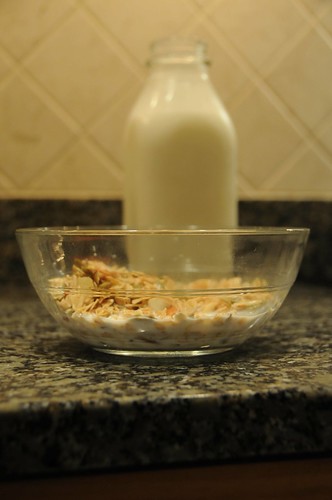
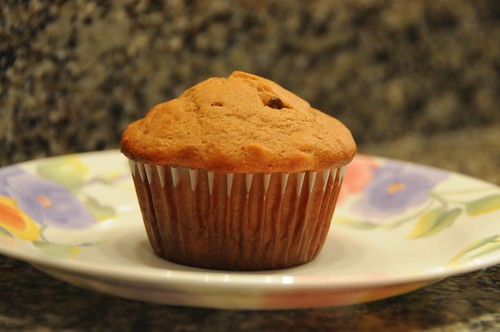
These muffins are made with granola right in the batter. The granola is softened by soaking it in milk before adding it to the muffin batter, and the resulting muffins are very moist and only slightly sweet. Like many muffins, I like these best split and buttered; I often put mine in the toaster oven in the morning to help get them to a butter-melting temperature.
Granola Muffins
Adapted from the New York Times
1 c. granola*
1/2 c. milk (whatever you have is fine)
2 eggs
1/4 c. honey
1/2 c. plain yogurt or sour cream
1/4 c. canola oil
1 t. vanilla
1 c. whole wheat flour
2 t. baking powder
1/2 t. baking soda
pinch salt
Preheat the oven to 375 F. Grease or line twelve muffin cups. Put the granola in a bowl, pour the milk over it, and let soak for at least 20 minutes.
Mix together the eggs, honey, yogurt or sour cream, canola oil, and vanilla. Add the dry ingredients (flour, baking powder, baking soda, salt) and stir just to combine, then fold in the granola.
Fill the muffin cups about 3/4 full and bake the muffins for 22-25 minutes, or until a toothpick comes out clean. Because they are so moist, it’s a good idea to let them cool for ten or fifteen minutes before removing them from the pan, especially if you’re not using liners.
*I think any granola would work here. I used the stuff I make myself, which starts off pretty chewy. If you use a really crunchy store granola, you might want to soak it a little longer.
When I first became vegetarian at age 17, I’d never seen a bean outside of a minestrone soup, so you can understand how it might have taken me a while to come around to them. I used burritos, where the beans are combined with strong flavors and other textures, as my gateway food, but soon moved on to white bean soup and other, simpler preparations. This, however, is by far the simplest one I’ve fallen for yet:
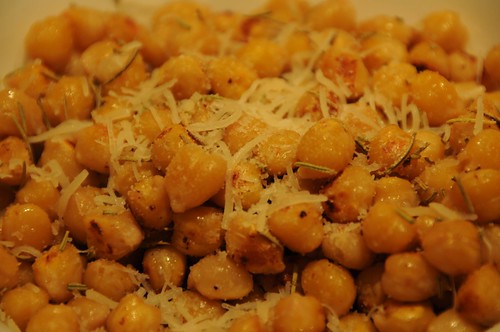
Did you know chickpeas pop in a hot pan? It’s not as spectacular an inside-out action as with popcorn, but they distinctly make popping noises and do a little dance. Also, it turns out, they get really tasty.
Popcorn chickpeas
I think that this first came to me through Serious Eats, but I wouldn’t swear it
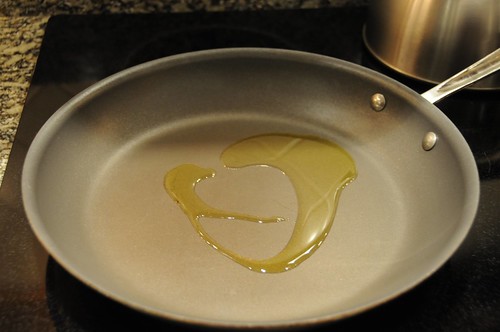
About 1 T. olive oil
2-3 cloves minced garlic or 1 t. crushed garlic from a jar
2 c. cooked chickpeas or the contents of one 15 oz. can, drained and rinsed
1 t. dried rosemary
salt and pepper
2 T. parmesan cheese
Heat the olive oil in a pan over medium-high heat. Don’t get too much higher than this or they won’t pop!
Add the garlic to the oil and cook for about 30 seconds. Then add the chickpeas. Stir to coat them with the oil, and then wait patiently. They’ll start to darken on the bottom and then pop. Shake or stir the pan occasionally.
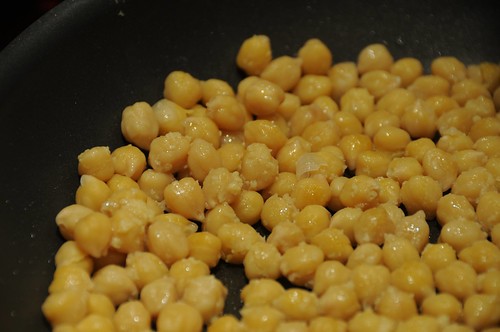
You can see in that photo that sometimes the skins come off the chickpeas; I usually pick them out, although there’s no reason you can’t eat them.
When they’re cooked to your liking, stir in the rosemary and season to taste with salt and pepper, then remove from the heat. Be careful not to oversalt; you’re going to add salty cheese in a minute! Turn the contents of the pan out into a bowl (I line it with a paper towel in case there’s any excess oil) and sprinkle the parmesan cheese on top.
I like these best fresh out of the pan, but they reheat well, too, and make a good snack.
|
|