For a long time, I was one of those otherwise-competent cooks who could not make a pot of rice to save her dinner. Then I ate a seriously restricted diet for six weeks to try to nail down some food sensitivities and rice was one of approximately eight foods I was allowed to eat, so I learned to make white rice on the stovetop. Brown rice continued to elude me, though. It took forever. If it wasn’t burnt, it was mushy. Or crunchy. Or sometimes both. And then a miracle occurred: someone taught me to make brown rice in the oven.
This recipe isn’t perfect: it still takes forever. I’m not sure there’s any help for that unless you’re willing to abandon your principles for converted rice (a move I don’t recommend if you care about rice texture). But if you are afraid of rice — or even if you’re not — it is the one for you. It takes ten minutes of attention and an hour of waiting, and best of all, it comes out perfectly every single time.
A word about pans: I have successfully made this in both glass and stoneware pans. I have attempted it in metal pans several times and have never gotten good results: the pan itself gets so hot that you end up with crispy rice in the corners, and no matter how carefully you scoop it out, you always end up getting some mixed in with the good rice and aaaaargh. Also, if you are cooking for more than a couple of people, you can double the quantities and bake for the same time in a 9×13 baking dish.*
Oven-baked brown rice
Adapted from The New Best Recipe by the folks at Cook’s Illustrated
1 1/2 c. rice**
2 1/3 c. water
pinch salt
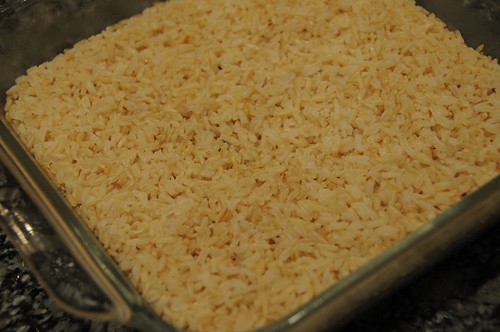
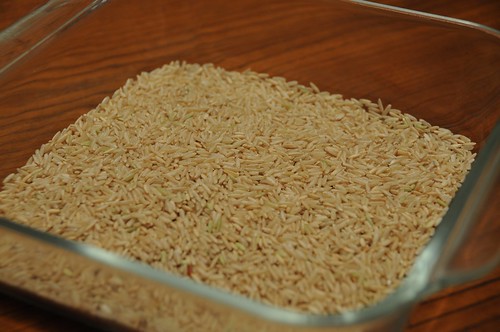
Put the water in a saucepan or tea kettle and bring it to a boil. Meanwhile, preheat your oven to 375 F and put the rice in your square baking dish.
When the water boils, pour it over the rice and immediately cover the pan with foil. You want to make sure it’s really sealed so the steam stays inside. Heavy-duty foil is awesome here; if you use lighter stuff, you might want to do a double layer.

Stick it in the oven (carefully, right? because of how the pan is full of boiling water?) and bake for an hour. Remove the whole thing from the oven and then pull off the foil, watching out for steam escaping when you first open it. Fluff with a fork before serving.
*I know someone is going to ask me if you can freeze this. The answer is “it depends.” Some people claim that frozen brown rice (cooked, cooled, and frozen in plastic bags) is totally fine, while others find the texture of rice frozen at home to be unacceptable. I am very picky about rice texture, so I don’t freeze mine, but if you do, tell me how it works!
**I can often get brown basmati at my supermarket, and I like it quite a bit. Failing that, I find long-grain to be the best general-purpose rice.
I have recently learned that there are some people (and by “some people” I mean “my mother”) who have never eaten latkes. I find this pretty much inconceivable. The two women I remember my mother doing social things with when I was small were both Jewish, and latkes have pretty much jumped the Jewish shark anyway and now can be made even by goyim like me.

I read a whole bunch of latke recipes, and they all pretty much agree on the critical ratio: about one pound of potato per egg. I used all-purpose flour and a relatively large quantity of onion, and made my latkes small so that there would be a lot of crispy per pancake. And they were pretty good: beautifully browned, crispy all over on the outside without being too mushy or eggy in the middle. If I had a Jewish grandmother, I like to think she’d be proud.
Potato Latkes
2 lbs potatoes (Russet are usually recommended, but I only had Yukon Gold and they worked fine)
1 large or 2 small onions
2 eggs
1/2 c. flour
salt and pepper
oil for frying
Peel the onion and potatoes and grate them, either on the coarsest holes of a box grater or in a food processor. I just grate them both into one pile without worrying about keeping the potato and onion apart.
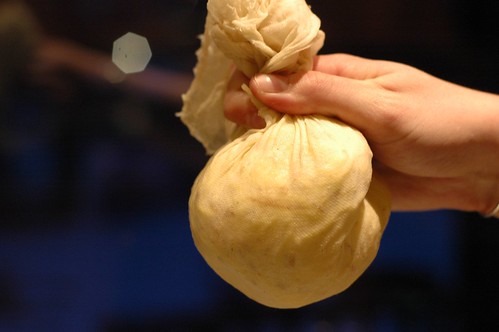
Now you want to get the moisture out. You can do this by putting them in a colander and smushing them down with your hands or a spoon, but the easiest way is to wrap them in cheesecloth and just twist away on the top as the water drips out the bottom.
Crack the eggs into a bowl and mix them with a fork to break up the yolks. Then add them to the potatoes, followed by the flour and salt and pepper to taste. Mix well so the flour gets evenly distributed.
Heat a heavy-bottomed skillet with a couple of tablespoons of oil over medium heat. Peanut oil is traditional — it takes high heat well — but canola works too. While you’re waiting for it to get so hot it shimmers, line a plate with paper towels.
When the oil is hot, drop the latkes in and flatten them slightly with the back of your spoon or a spatula. Don’t pack them in too tightly or they’ll be hard to flip later. Cook until they’re golden brown around the edges.
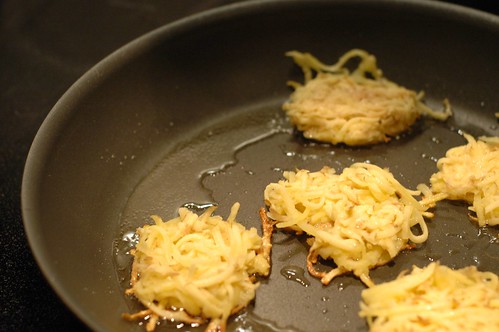
Then flip and cook until the other side is golden brown before removing to the paper-towel lined plate.
I like them best fresh out of the skillet, but they can be reheated in the oven or toaster oven, either directly on the rack or by placing a cooling rack on top of a cookie sheet and the latkes on top of that. Bake at 400 F until hot and crisp.
This technique has changed my cooking life. It has ended my relationship with canned beans (I never really loved you) by providing an alternative that doesn’t take hours, require planning ahead to soak, or call for a pressure cooker. The best part: it takes beans from in-the-bag to beautifully cooked in ninety minutes. True story!

I think that this (completely genius) idea first appeared on the internet on eGullet, and it came to me through the Paupered Chef. And at this point, all I can do is apologize for holding out on you so long.
Ninety-minute no-soak beans
1 lb beans
Two big pinches of salt
Water
Preheat your oven to 250 F.
Pick over the beans to make sure there are no rocks in there. (Seriously, this happens.) Put them to a Dutch oven* and add cold water to cover them by a couple of inches.
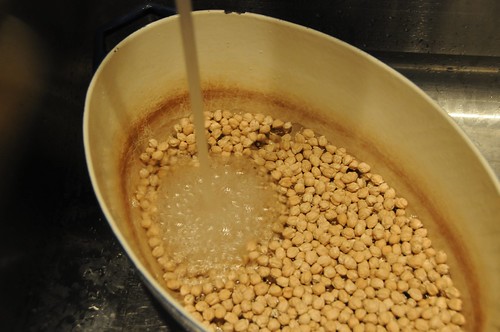
Add the salt, and put the whole thing on the stovetop. Bring it to a boil on the stove.
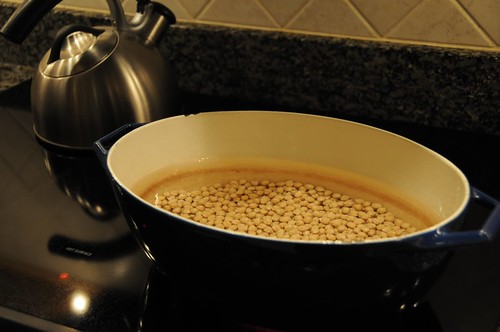
When it boils, put on the top, move the entire thing to the oven, and bake for about 75 minutes. It’s worth peeking in around 40 minutes to make sure they’re still covered in water. If not, heat some more water to a boil and pour it in.
Taste one at 75 minutes to make sure that they’re done; if not, you can leave them in for a few more minutes. (If your beans take more than 90 minutes in the oven, it’s probably a sign that they’re quite old and you should check the expiration date on your package! Nothing terrible will happen to you, but they will probably suffer in both taste and texture.)
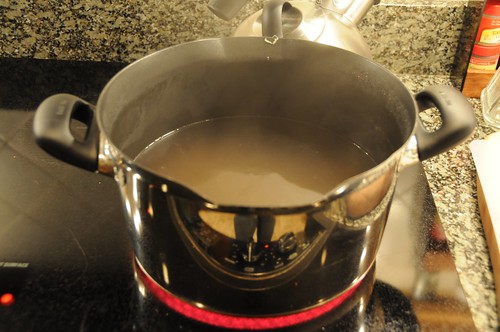
*Okay, the Dutch oven situation. They are awesome, and not just for this, and if you don’t have one, you should consider it! There are two brands, Lodge and Tramontina, that make good enameled cast-iron versions that come in around $60 (rather than the $200+ that Le Creuset and Staub will set you back).
If you don’t have one, I have an untested theory that you could make it work by boiling the water in a kettle or pan and putting the beans in a Pyrex or enameled stoneware pan, then pouring the water in, covering tightly with aluminum foil, and baking as directed. If you try this, let me know!
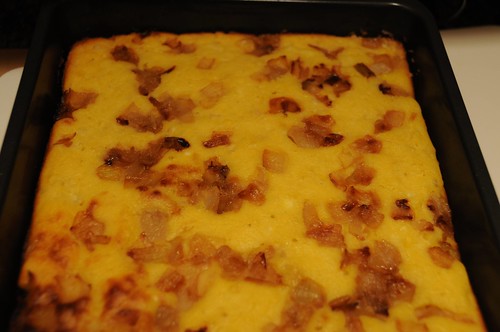
You’re probably all on to my little secret: I think caramelized onions improve almost anything. I first discovered them at age twelve (on a pizza at Bertucci’s, if you’re wondering) and I have since added them to all kinds of things (including mashed potatoes). This recipe, which adds them to cornbread, is pretty much a stroke of genius.
(Southerners, you may wish to avert your eyes for the remainder of this entry, as I am about to suggest a number of highly unorthodox alterations to traditional cornbread, at least some of which probably constitute heresy. Forgive me.)
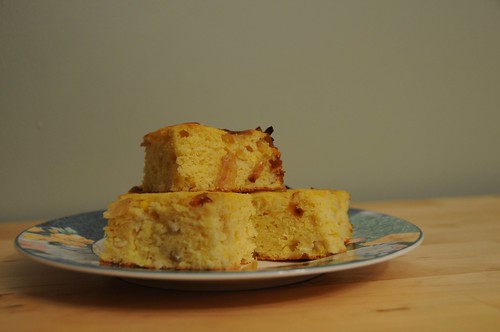
The secret ingredient in this recipe is goat cheese, which plays the part of butter with an added tang. (Not that there’s any shortage of actual butter to go with it. I wouldn’t do that to you.) The goat cheese flavor doesn’t come through strongly, but it provides a nice balance to the sweetness of the corn kernels and onions.
Caramelized Onion Cornbread
Adapted from Smitten Kitchen
1 c. yellow cornmeal*
2 c. buttermilk**
2 onions
salt
6 T. butter
6 oz. of goat cheese (the kind that comes in a log)
3 eggs
2 T. honey
1/4 c. granulated sugar
1 3/4 c. flour
1 1/2 T. baking powder
1/4 t. baking soda
2 1/2 c. (about 16 oz) corn kernels (fresh or frozen-and-thawed)
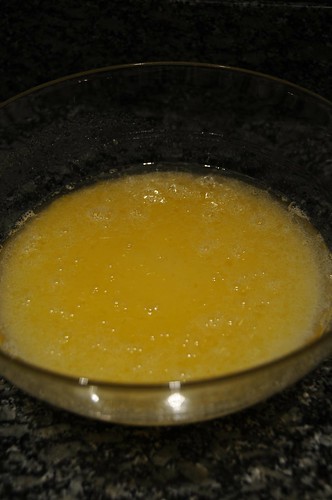
The night before, mix the cornmeal and the buttermilk and leave them to soak, covered. Take the goat cheese out of the fridge and leave it to soften. (If you’re doing this on the spur of the moment, let the corn and buttermilk soak for about 20 minutes and slightly soften the goat cheese in the microwave. Don’t melt it!)
When you’re ready to bake, peel and dice the onions, then heat 2 tablespoons of the butter in a heavy-bottomed skillet over medium-low heat. Add the onions and a pinch of salt and cook slowly. You want to still hear some sizzling and popping, but keep the heat just above where it stops. Stir them occasionally so they cook evenly, and keep cooking until they turn a lovely deep caramel brown. This will take at somewhere between fifteen and thirty minutes, depending on how impatient you are low you keep the heat. Set aside.
Preheat the oven to 350 F.
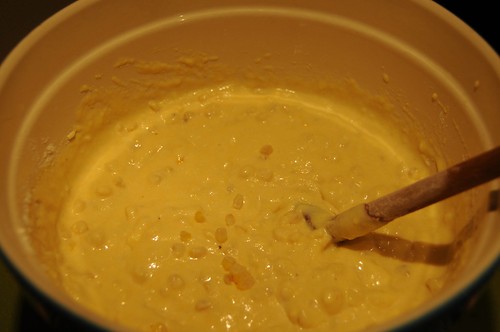
In a big bowl, beat the goat cheese like you would butter, creaming it until it’s fluffy. (A stand or electric mixer can be a help here, but you can also totally do it with elbow grease.) Add the eggs one at a time (really, this helps!) and mix to combine. Do not fret if it looks curdled; everything will be fine!
Melt another 2 T. of butter in the microwave or a saucepan. Add it to the mix, along with the sugar and honey. Then stir in the cornmeal/buttermilk mixture. Mix well.
Now find your baking pan — you can use a 9×13-inch rectangular pan, a round 10-inch pie or cake pan, or my favorite, a 10-inch well-seasoned cast iron skillet — and put it in the oven with the last 2 tablespoons of butter in it. Leave it there while you finish mixing so it gets hot and the butter melts. (Word to the wise: do not use a nonstick pan for this; the coating may come off and that stuff is not for eating.)
To the batter, add the flour, baking powder, and baking soda, along with another pinch of salt. Stir to combine, then gently stir in the corn kernels.
By now, your pan should have spent five minutes or so in the oven. Take it out — very carefully — and tilt it to spread the butter around. Pour the batter in, let it spread, and then sprinkle the caramelized onions on top.
Bake for about 30 minutes, until a toothpick comes out clean. Allow the bread to cool for ten or fifteen minutes before slicing it. This bread also freezes well (cut into pieces and stored in freezer bags); reheat it wrapped in tinfoil in a 200 degree oven.
*Ideally, what you want here is coarse or stone-ground cornmeal. You can sometimes find this in with natural foods in fancy brands (or as dry polenta); there’s also a version made by Goya that’s often in the international food aisle.
**Worth buying, but if you don’t have it, you can make a substitute by putting 2 tablespoons of white vinegar in a liquid measuring cup and adding milk until it reaches the 2-cup mark and then waiting a few minutes for it to curdle.
First apology: I’m sorry! I posted two recipes on Tuesday, in a fit of post-scheduling failure, and then topped it off by posting nothing yesterday!
Second apology:

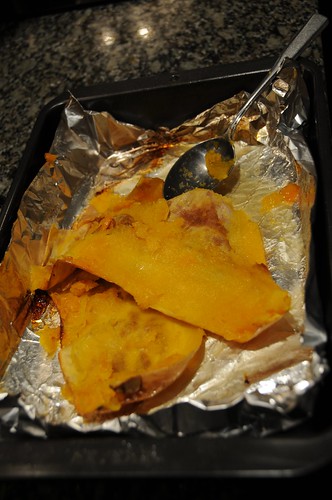
I make a lot of soup, and I like a lot of it, but this is a serious contender for being the most universally acclaimed. The kick of the ginger is the perfect counterpoint to the sweetness of the roasted squash, and you can create your ideal soup texture by putting in more or less broth at the end. It’s a staple of my family’s holiday tables, but if you keep roasted butternut squash in your freezer (and you should!), it’s also a quick weeknight supper option. Beats the heck out of Chinese takeout!
Butternut squash soup
Inspired by a recipe from a previous edition of The Joy of Cooking
1 butternut squash
Canola oil
1 onion or 2-3 leeks
3 T. grated fresh ginger*
About 1 quart of vegetable broth
Salt and pepper
Preheat your oven to 400 F.
Cut the butternut squash in half and scoop out the seeds and strings. Rub the cut sides with canola oil, including inside the hollows. Line a rimmed baking sheet or 9×13 inch pan with aluminum foil (which will make your cleanup life much, much better) and place the squash on it, cut side down. Roast for about 45 minutes, until you can easily poke a toothpick or fork all the way the flesh of the squash.
About five minutes before it’s done, peel and chop the onion or the white and lightest green parts of the leeks, and start a stock pot warming over medium heat with a splash of canola oil in the bottom.
Remove the squash from the oven and flip the halves over. Wait a few minutes until they’re cool enough to handle and then scrape the flesh out of the skin. (This is the point at which you would freeze the squash if you were saving it for later.)
Saute the onion until it begins to soften. Then add the ginger, and cook until the onion is very soft and the ginger is fragrant, 3-5 minutes. I know it sounds like a lot of ginger, but trust me, you want to add it all now. Ginger added later in the cooking time with have a much stronger bite!
Add the squash and about 2 cups of broth. (If you’re using frozen squash, just stick it in at this point; no need to defrost.) Bring the whole mixture to a simmer and cook for about 15 minutes, using your spoon to break up big chunks of squash. Then stir in the rest of the broth. You can add even more than the recommended four cups if you like your soup thinner; if you like it thick, you might not want to add any additional broth at this point.
Puree the soup in a blender or food processor (being careful not to overfill the container with hot liquid!) or with an immersion blender. Salt and pepper to taste.
*Two important notes here. First, you can keep fresh ginger in the freezer. It lasts a long time in the fridge too, but this way you never have to worry. Second, you can grate it without peeling.
While the virtue of scones is in how quickly they come together, the beauty of coffee cake lies in how easy it is to make ahead. If you have extra freezer space (I know, very funny), you can even store a baked one, tightly wrapped, against emergency brunch needs!
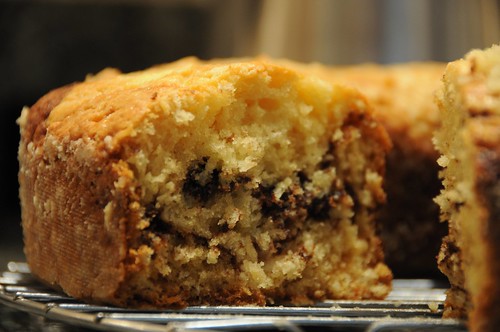
This one is a pretty everyday cake: it’s not super-rich, topped with streusel, or filled with chocolate chips. (That last one is coming, I promise.) But these very features are the ones that have given it the power to convert the “coffee cake is always too sweet” crowd (by which I mean “my mom”). Although it contains both cocoa powder and instant espresso, both flavors show up as a depth of flavor, rather than with strong tastes of their own.
Bundt Coffee Cake
Adapted from Lucinda Quinn’s Mad Hungry: Feeding Men and Boys, a book to whose very title I object on feminist grounds, via Serious Eats
1 stick butter, ideally unsalted
1 c. plus 2 T. sugar
2 eggs
1 t. vanilla extract
1 c. sour cream
2 c. flour
1 t. baking soda
1 t. baking powder
pinch salt
1 T. instant espresso powder
1 T. unsweetened cocoa powder
Preheat the oven to 350°. Grease a bundt pan well, remembering to grease the center. Although I don’t generally like it, if you’re using decorative bundt pan, cooking spray is probably your friend here.
Soften the butter (either by leaving on the counter overnight or in the microwave) and cream it with the cup of sugar. Add the eggs and vanilla and beat until combined.*
Add about half the sour cream and mix, then add the flour, baking soda, baking powder, and salt. Finish by adding the rest of the sour cream.
Now find a little bowl and put the remaining two tablespoons of sugar in, along with the cocoa powder and espresso.
Take half of your batter and make a ring around the center of your bundt pan. The batter will be stiff! Then top it with the espresso-chocolate mix, and arrange the rest of the batter in a second ring on top. It’s going to look extremely lame.

I swear to you that the cake in this photo is the same as the cake in the first photo! The oven makes it all okay. Trust me.
Now you’re going to bake it. Start checking at 30 minutes, especially if you’re using a larger pan. You can jiggle the pan — it should be set all the way through — and then test with toothpicks. It should take about 40 minutes in a larger pan and 50-55 minutes in a smaller one.
Let it cool completely before turning it out.
Serves eight generously or 16 as part of a meal.
*Here’s where most recipes are going to tell you to add eggs one at a time. In the end, it doesn’t matter much, but you may find it easier to mix them in if you do them singly.
Now is probably as good a time as any to confess that I have a pretty serious issue with raisins. Like, I have a hard time even just calling them “raisins” and not the-evil-scourge-raisins, which is what I believe them to truly be. Still, it’s okay with me if you like them. More for you!
Anyway, this whole raisin issue kept me from trying a number of foods for a long time. Scones were one of these casualties. But another one was carrot cake.
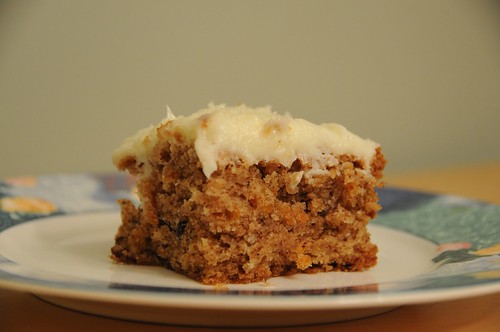
Carrot cake is especially dangerous to raisin-haters since some genius introduced golden raisins, which should pretty much be labeled “now even harder to pick out!” Not fair, I say.
Then, one fine day, I came across this recipe, from a fellow raisin-hater, and I knew that fantastic carrot cake would be mine, any time I wanted it. Bliss.
Carrot Cake
Adapted from Food on the Food
1 1/2 c. canola oil
2 1/2 c. sugar
4 eggs, separated
5 T. water
2 1/2 c. flour
1 1/2 t. baking powder
1/2 t. baking soda
pinch salt
1 t. nutmeg
1 t. cinnamon
1/2 t. cloves
3-4 carrots
1 c. pecans
Frosting
1 stick (1/4 lb) butter, softened
8 oz cream cheese (low fat is okay, but don’t use fat-free here)
1/2-3/4 lb. confectioner’s sugar
Preheat oven to 350 F. Grease a 9×13 inch pan.
Chop the ends off the carrots. Wash or peel them, then grate. The easy way to do this involves a food processor. The hard way involves, you know, a grater. Either way, look out for fingers! You want to end up with about 1 1/2 cups of grated carrot.
In a big bowl, mix the oil and sugar. Beat in the 4 egg yolks, then add the water.
Add the flour, baking powder, baking soda, salt, and spices. (If you have lumps in your stuff, you might want to do this through a strainer, but I’m generally not bothered.) Stir in carrots and nuts. Batter will be very thick.
In another bowl, beat the egg whites with an electric mixer until stiff peaks form. Stir about a quarter of the egg whites directly into the batter to lighten it up, then gently fold the rest of the egg whites into the batter. A rubber or silicone spatula is your friend here.
Pour the batter into the pan and bake 50-60 minutes, or until a toothpick inserted into the center comes out pretty cleanly. (Crumbs yes; batter no.) Let cool.
To make frosting, whip together butter and cream cheese with an electric mixer. Add 1/2 lb. confectioner’s sugar and mix until it’s as lump-free as you require. (If you are really strong on the lumplessness, you might want to put the sugar through a sifter.) I found this plenty sweet, but if you like it sweeter, go ahead and add more sugar.
Frost the cake when cool. I like to do this right in the pan, but if you have a platter that will hold the whole cake, go for it. Alternately, you can bake the cake in two eight- or nine-inch round pans, in which case you’ll want to double the frosting so you have enough for a layer cake.
This is the first in an occasional series covering really excellent ways to make simple core ingredients. This week: vegetable stock.
As most people who have cooked for vegetarians can attest, store-bought vegetable stocks vary widely in taste, and only a few are palatable to me. In some cases, like strongly flavored soups, the precise taste isn’t so important, but dishes like risotto, the taste of the broth can really dominate the dish.
Which brings us to the much-vaunted solution: make your own!
I have two pieces of good news about this. The first is that making stock is as easy as throwing some stuff in a pot with a lot of water, bringing it to a boil, and waiting. The second is that pretty much anything you make is going to be better than store-bought stock, so experimenting is pretty painless.
Vegetable Stock
What to use:
The usual suspects: These include carrots, celery, potatoes, and onions. Onions need the papery skin peeled off, and I usually trim parts I wouldn’t use in cooking off the vegetables, although some people report great results with leftovers like peels. (If you try this, let me know!)
Other veggies: Mushrooms, parsnips (they’ll make the broth cloudy, but who cares?), sweet potatoes or winter squash, peas, corn
Aromatics: Peeled garlic cloves are a great addition, and a bay leaf is practically mandatory. Parsley is common, as are whole peppercorns and thyme.
Salt: You need some! You can use anything you have on hand, or try soy sauce.
Extras: White wine is perhaps the most common addition to vegetable stock. You can also use a splash of fruit juice (try apple cider!) for a slightly sweet stock that would be good in squash soup.
Look out for: Brassica vegetables (cabbage, broccoli, and cauliflower) often taste overwhelmingly strong. Use tomatoes in moderation, as they have a strong flavor too. Beets will make your stock pink. Using herbs with a particular flavor palette is fine, but remember to label your stock with this so you don’t use something heavy on Italian herbs to make a Japanese soup!
The method
Roughly chop the vegetables: quartering them is fine!
Aim for roughly equal volumes of vegetables and water. If eyeballing is not your strength (it isn’t mine!), throw the vegetables into a big liquid measuring cup as you chop. Throw it all in a stock pot. [Note: do as I say, not as I do, here. The photo below doesn’t have nearly as many vegetables in it as you should use!]
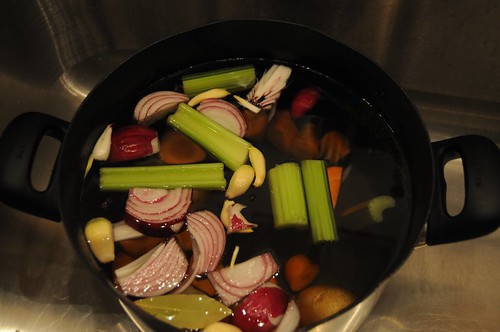
Heat it to a boil, then lower the heat until it’s simmering. Leave the top off. Simmer for about an hour.
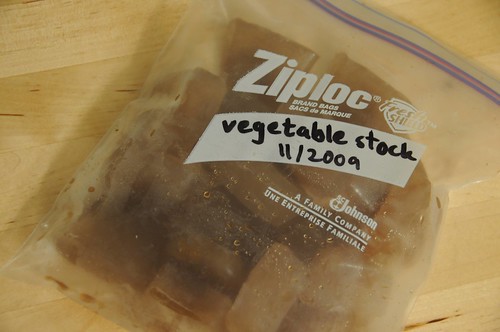
You can strain the stock at this point with a colander and store it in the fridge or freezer, or you can continue to simmer it until it reduces significantly — I usually aim for about an eighth of the original volume — and then cool it and freeze it in ice cube trays. Once it’s fully frozen, you can pop it out and throw the cubes into bags for later use. Note how concentrated it is so you know how much water to add when you use it!
Stock will keep a few days in the fridge; if you need it to keep longer, pour it out into a pot, boil it for 10 minutes, and then put it back in the fridge. It will keep forever in the freezer, but will taste best in the first two or three months.
Okay, I know, I just posted a recipe for oatmeal chocolate chip cookies last month. But I’m making up for lost time here. And these are different!
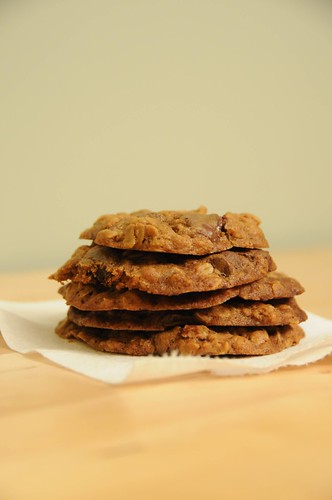
Not only do they have a secret ingredient (that would be the coffee, which almost no one will notice until you tell them it’s there), but they have an entirely different texture than those other cookies. They’re thin and chewy, more like a florentine or lace cookie than a cousin of the ordinary chocolate-chip variety. The brilliance of these cookies is subtle: the coffee helps cut the chocolate flavor, while providing depth that makes them taste rich.
One word of warning: these cookies are delicate flowers. If you want to travel with them, they’re going to need first-class passage in a hard-sided container. Of course, you could avoid that problem by eating them all yourself.
Coffee Oatmeal Chocolate Chip Cookies
Adapted from Baking Bites
1 1/2 T. instant espresso powder
3 T. water
1 c. butter
1 1/2 c. brown sugar
1 egg
1 t. vanilla
1 1/2 c. flour
1 t. baking soda
pinch salt
2 c. old-fashioned oats (you can sub quick-cooking oats, but don’t use instant!)
1 1/2 c. chocolate chips
Preheat oven to 325 F. Line a baking sheet with parchment paper.
In a small bowl, dissolve the espresso powder in the water and set aside.

In a big bowl, cream together butter and sugars until light and fluffy. (Soften the butter first if you’re taking it from the fridge; try the defrost setting on your microwave to achieve this without melting it.) This is easiest with a hand or stand mixer, but can totally be accomplished with a big spoon and some bicep action. Mix in the egg and vanilla extract, followed by the espresso.
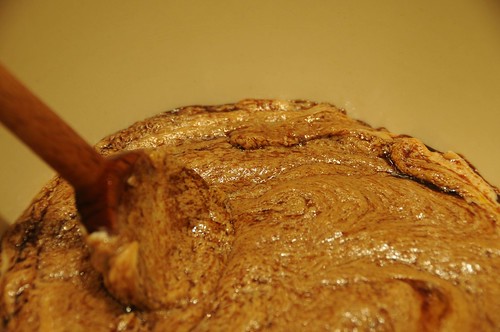
(I love the instruction “add espresso.”)
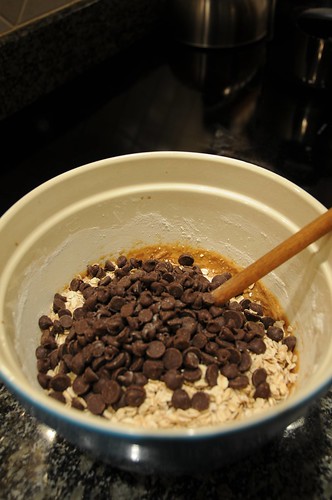
Stir in the flour, baking soda, and salt, then add the oats and chocolate chips and mix until combined.
Drop roughly one-inch balls onto your lined cookie sheets, leaving room for the cookies to spread while baking. (It’s not a tragedy if they run into each other, but they look prettier if they don’t.)
Bake for 12-14 minutes, until cookies are golden-brown on the edges and set all the way through. Remove from the oven and let them cool for a couple of minutes before moving the cookies to cooling racks.
Makes about 3 1/2 dozen.
The most brilliant quality of these sweet potato falafel is their taste, of course, but the second most brilliant quality is that they’re the kind of food that seems fancy but is actually really easy to make.

I also love the savoriness of this dish. Too often sweet potatoes get relegated to glazed preparations, but they play well with these Indian-inspired spices too.
Sweet potato falafel
Adapted from Leon: Ingredients and Recipes by Allegra McEvedy, via 101 Cookbooks
2 medium sweet potatoes (about 1 1/2 lbs, but don’t be fussy)*
2 t. pressed or crushed garlic
3 t. mild curry powder**
2 t. garam masala***
scant cup chickpea flour (also called “gram flour”)****
salt and pepper
olive oil to grease the tray
Preheat the oven to 425 F. Wash the sweet potatoes thoroughly (I like to use a dish brush with no soap) and pierce the skin several times with a fork or paring knife. Roast the sweet potatoes whole — you can put them directly on the rack — until tender. This will take at least 45 minutes, but could be up to a bit over an hour; bamboo skewers made for kebabs are great for testing to make sure the center is cooked through.
Remove the potatoes from the oven, chop them in half, and let them cool until you can handle them. Turn the oven temperature down to 400 F while you wait. When you can pick them up comfortably, squish the flesh out of the potatoes (I find squeezing them like toothpaste tubes easiest) and into a bowl. The flesh closest to the peel won’t come out, which is fine: it’s usually more fibrous anyway. Alternately, you can scoop them out with a spoon, but be careful: the skin is fragile.
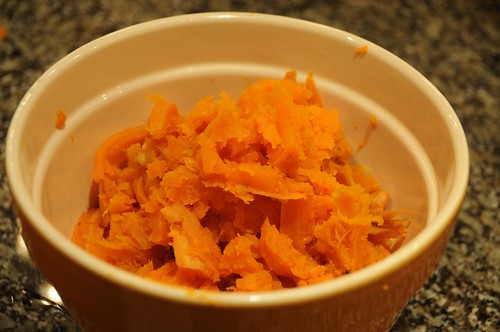
Add the garlic, curry powder, garam masala, chickpea flour, and salt and pepper to the potatoes and mash until there are no more big chunks of potato. Taste it — if you’re into spicy, you might want to add more curry or garam masala. The mixture should be moist but not very sticky; if it’s too sticky (sweet potato water content can vary a lot), add an extra tablespoon of chickpea flour.
Lightly oil a cookie sheet with olive oil. You can use spoons or a scoop to shape the falafel, just plunk them down in mounds (still completely tasty!), or scoop bits up with your fingers and roll them between your palms to make them more uniform in appearance, as I did here.

Bake for 15-20 minutes, until the bottom turns golden brown and the top no longer looks wet.
Makes 18-20 falafel, which is enough for three servings as a main dish or four to six as a side; it doubles well!
*There is a lot of confusion in the U.S. about sweet potatoes versus yams. In this case, you want something with orange flesh, no matter what it’s sold as!
**I use the Sweet Curry Powder from Penzeys because I want flavor more than heat. Curry powder is one place where it’s worth not just buying the grocery store version, but also one highly subject to personal taste!
***The best garam masala comes from an Indian grocery store; if you don’t have one in your area, you can buy from one online or — of course — from Amazon.
****This is easy to find at Indian groceries and at some regular grocery stores. Health food stores are another reasonable bet, as it’s sometimes marketed to gluten-free folks. Failing all else, again with Amazon.
|
|